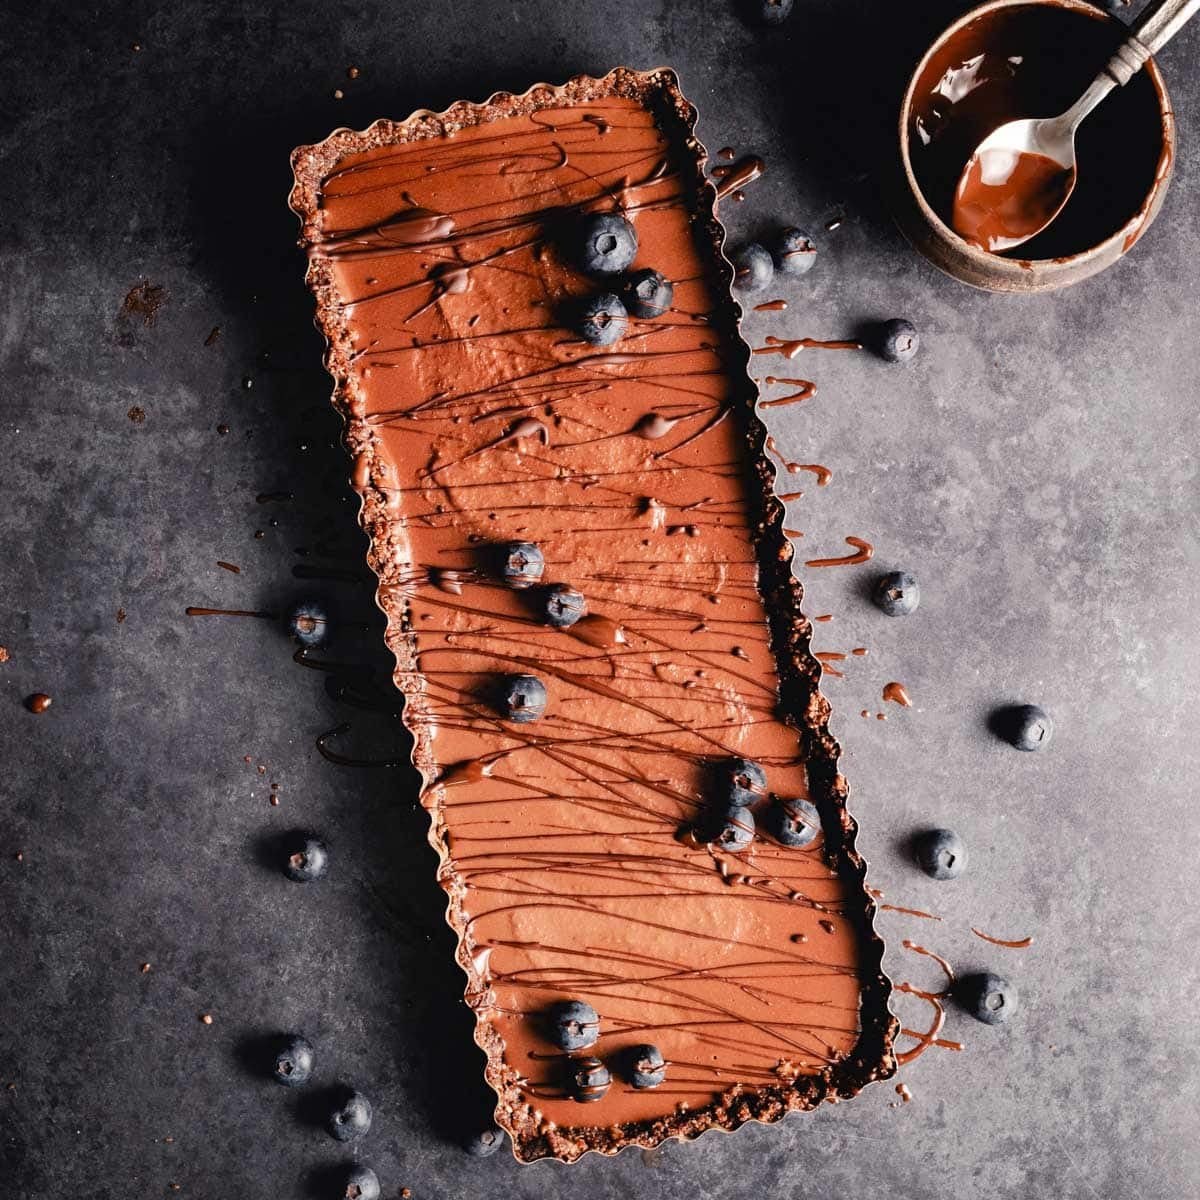
Looking for an impressive dessert that is so easy to make, no one will believe it? Here it is with my vegan no-bake chocolate cheesecake. This dessert is just right for everyone with no dairy or gluten, either, ensuring that every guest can indulge without worry.
This post may contain affiliate links. Please see our disclaimer for details.
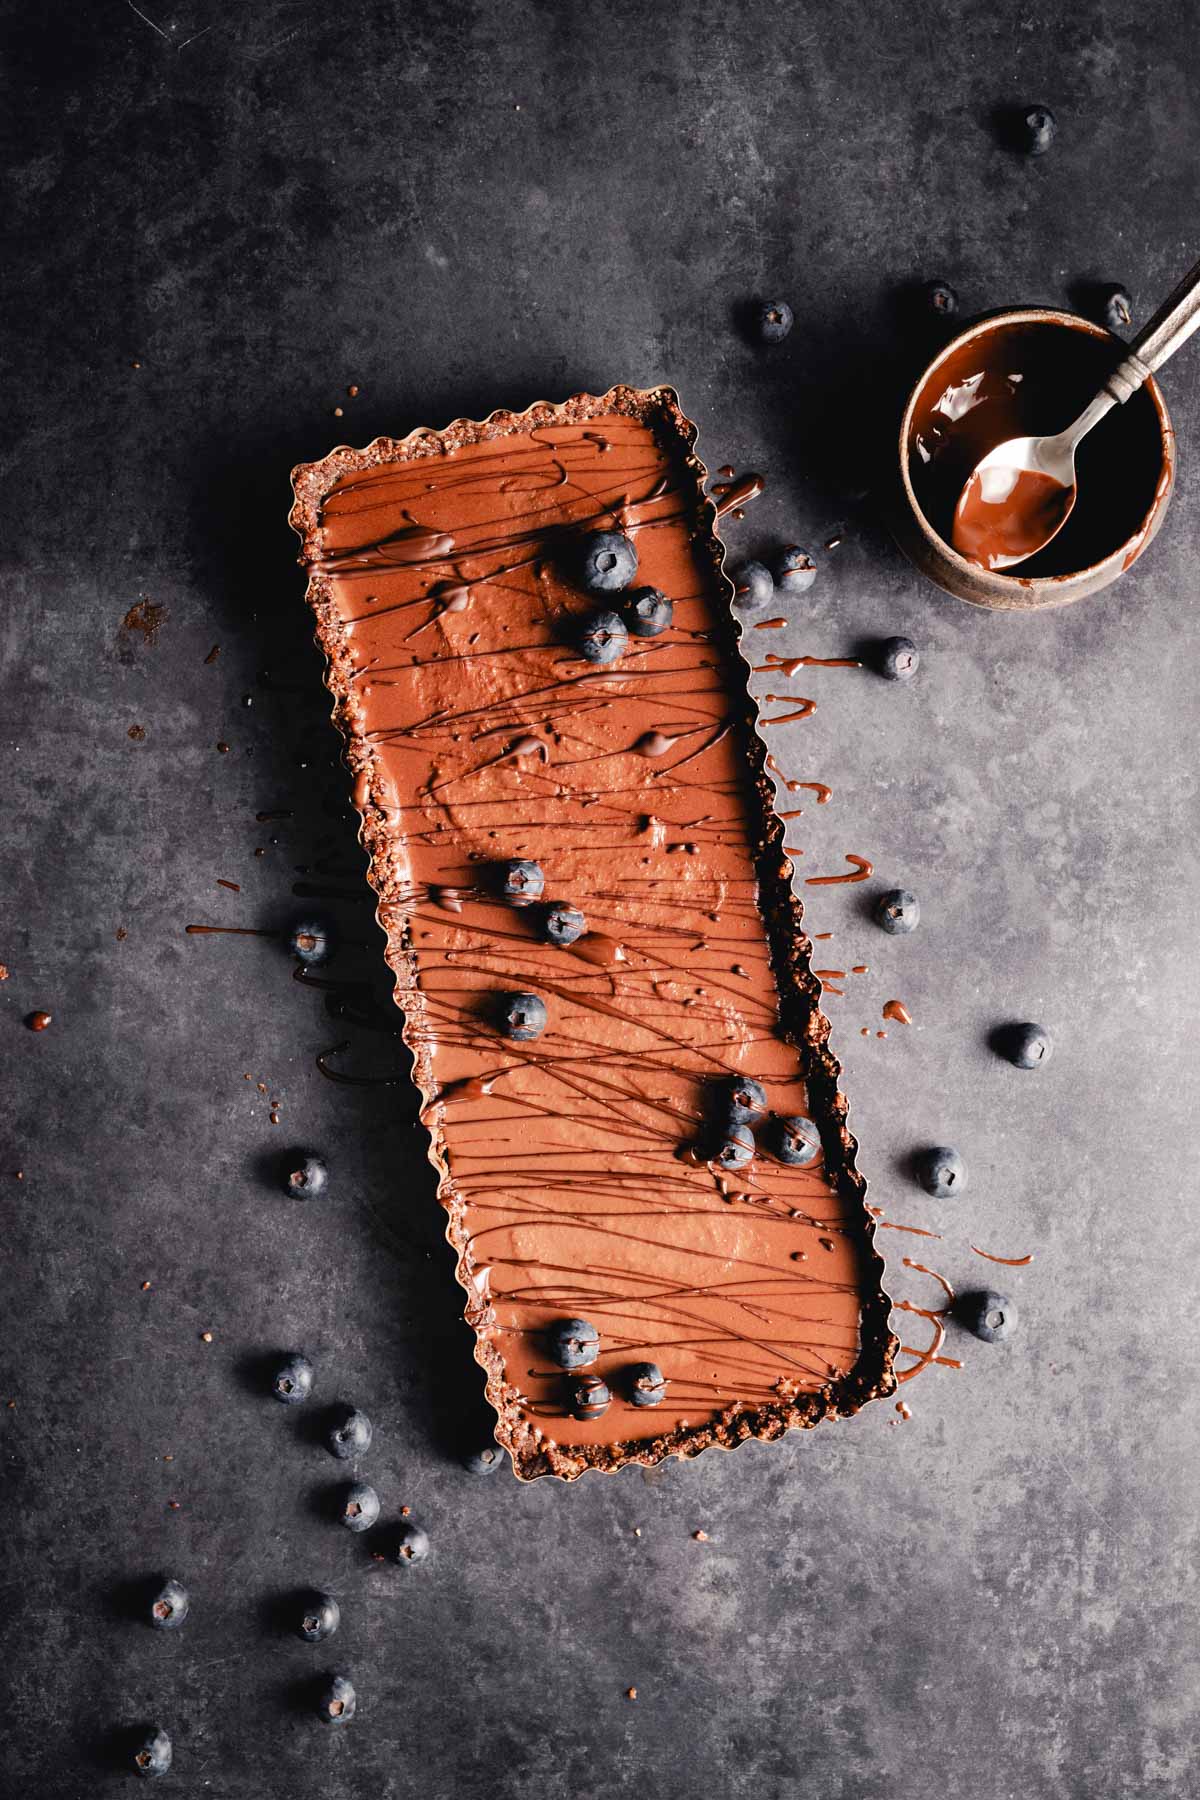
Table of Contents
Why You’ll Love This Recipe
- Creamy: This chocolate vegan cheesecake has a sublimely luxurious texture, adding to its sinfully delicious flavors.
- Antioxidant-rich: This raw vegan chocolate cheesecake recipe uses pecans, medjool dates, and cacao powder, making it a wholesome choice.
- No-bake: Entertain without all the fuss since this no-bake chocolate cheesecake simplifies your party planning!
Nutrition For Mental Health
As a nutritionist, I am a big fan of cacao! One tablespoon of cacao powder has 3 grams of carbohydrates (2 grams of fiber), 0.5 grams of fat, and 2 grams of protein. It is rich in antioxidants. Cacao powder contains calcium, potassium, and iron. A systematic review and meta-analysis found that consuming cocoa-rich foods can positively affect mood in the short term.
Ingredients + Notes
Make this chocolate vegan cheesecake, and you’ll be the ultimate hostess. Get ready, because once they take a bite, they’re going to swarm you for the recipe.
- Maple syrup: I love using maple syrup. However, you can use whatever liquid sweetener you have on hand, such as agave (if that is your preference).
- Dates: I recommend using Medjool dates because they are soft and moist.
A full list of ingredients with exact amounts can be found in the recipe card below.
Substitutions + Variations
You can add your own touch or find a way to make a swap for something you’re missing right here.
- Cocoa powder: This is my favorite cacao powder for everything I make, bake, and more!
- Vegan butter: If you don’t have coconut oil on hand, vegan butter can work in a pinch!
- Nuts: This raw cheesecake uses pecans for the crust; you could use any nuts in the crust you like. For the cheesecake part, you need to stick with cashews, though.
- Espresso powder: One great baking secret is to add a little espresso powder to chocolate desserts. It brings out the richness of the chocolate, making it taste like something out of a Michelin-star restaurant.
How To Make Vegan Chocolate Cheesecake
Seriously, the hardest part about making this dairy-free, gluten-free, raw, no-bake chocolate vegan cheesecake is waiting for it to freeze. Whip this up and hold onto your patience…it’s worth it!
For the Crust
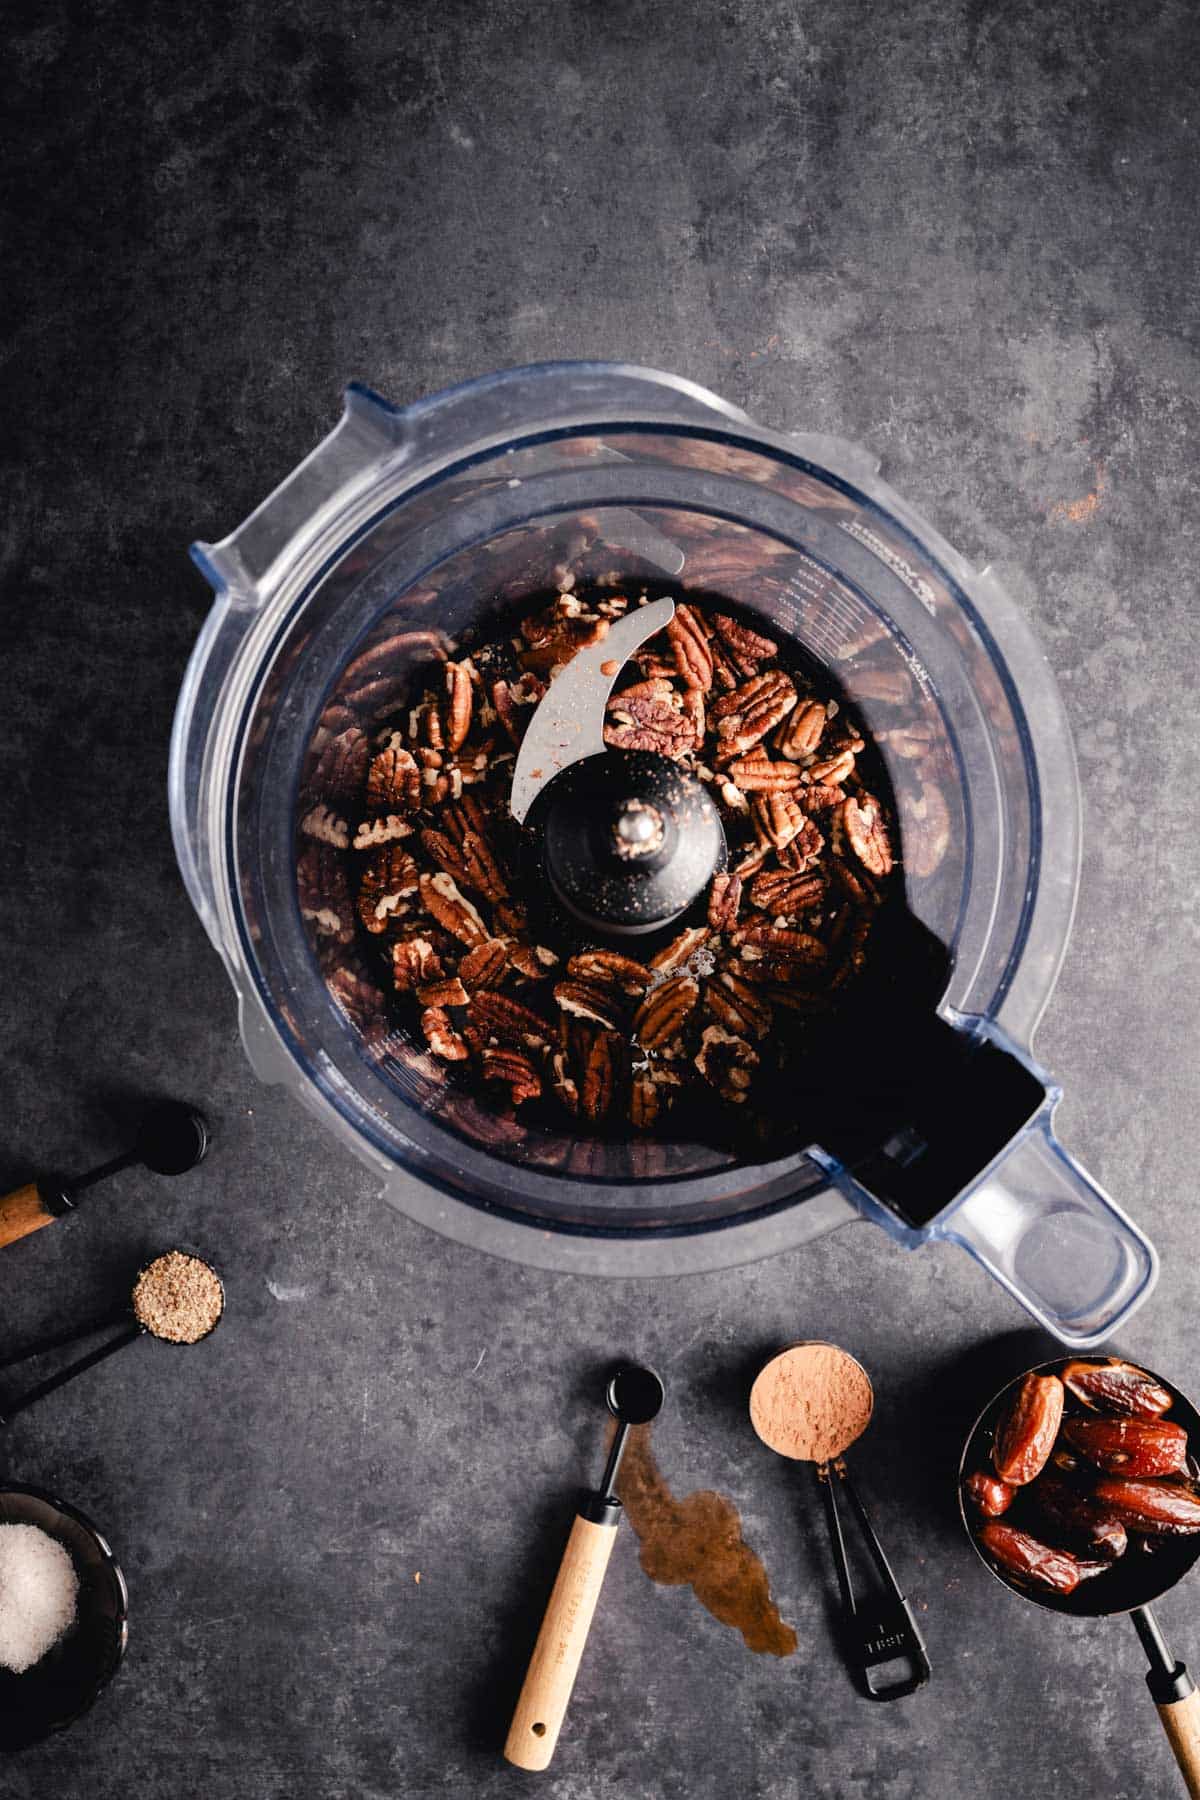
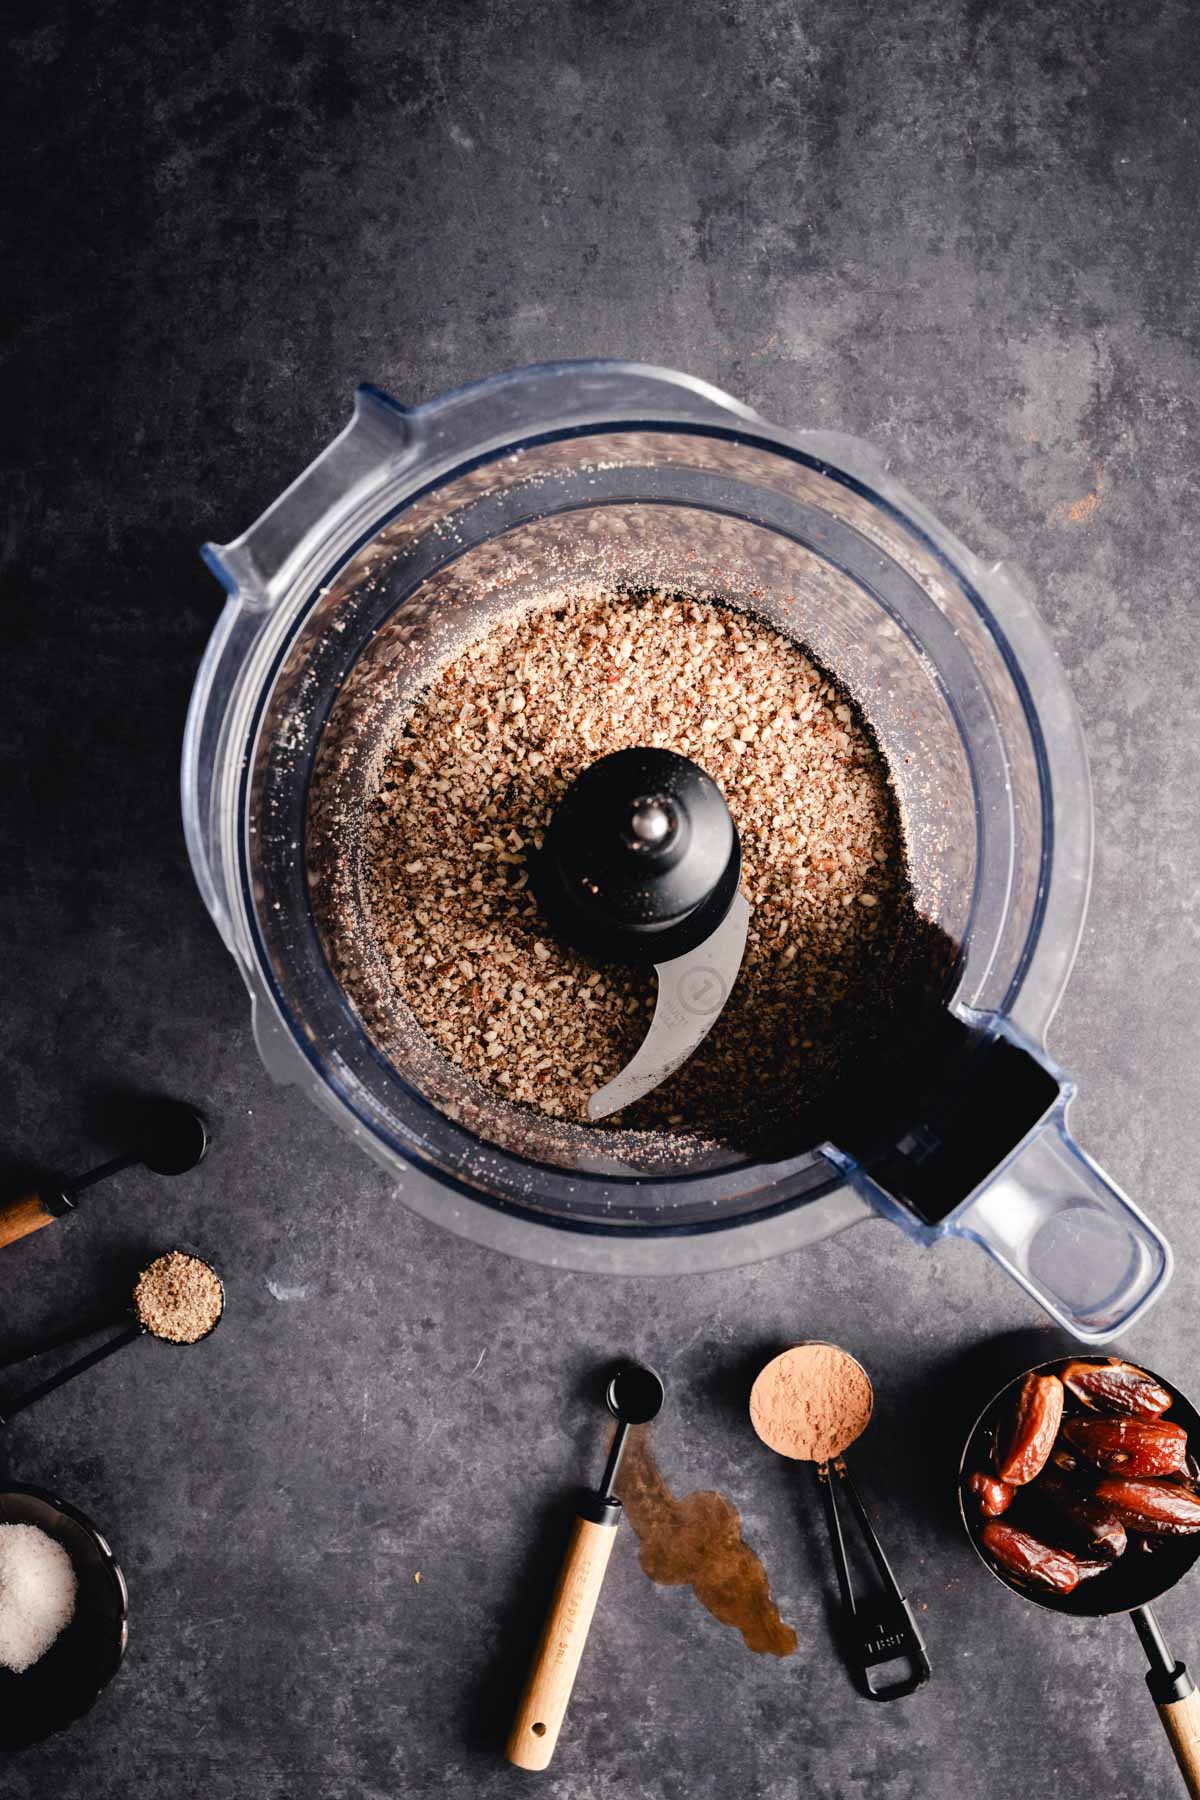
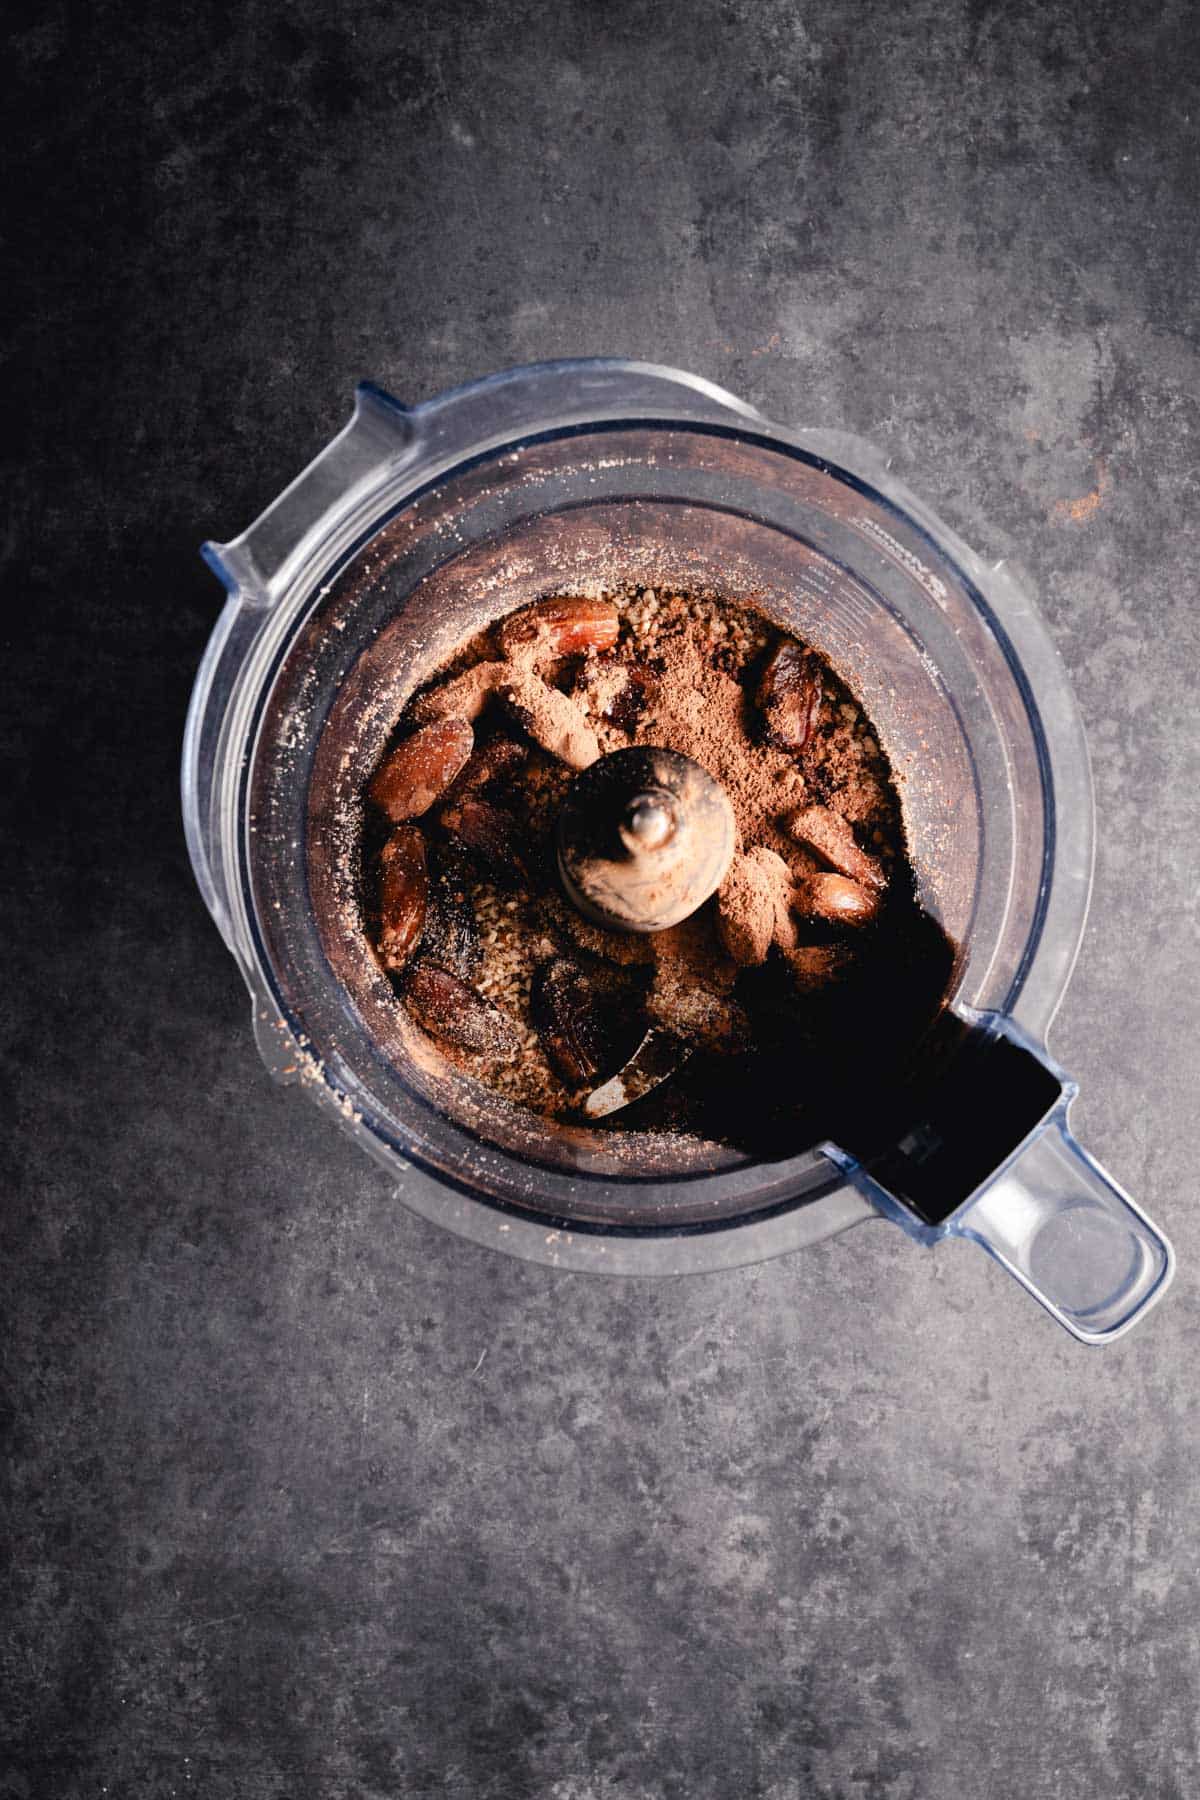
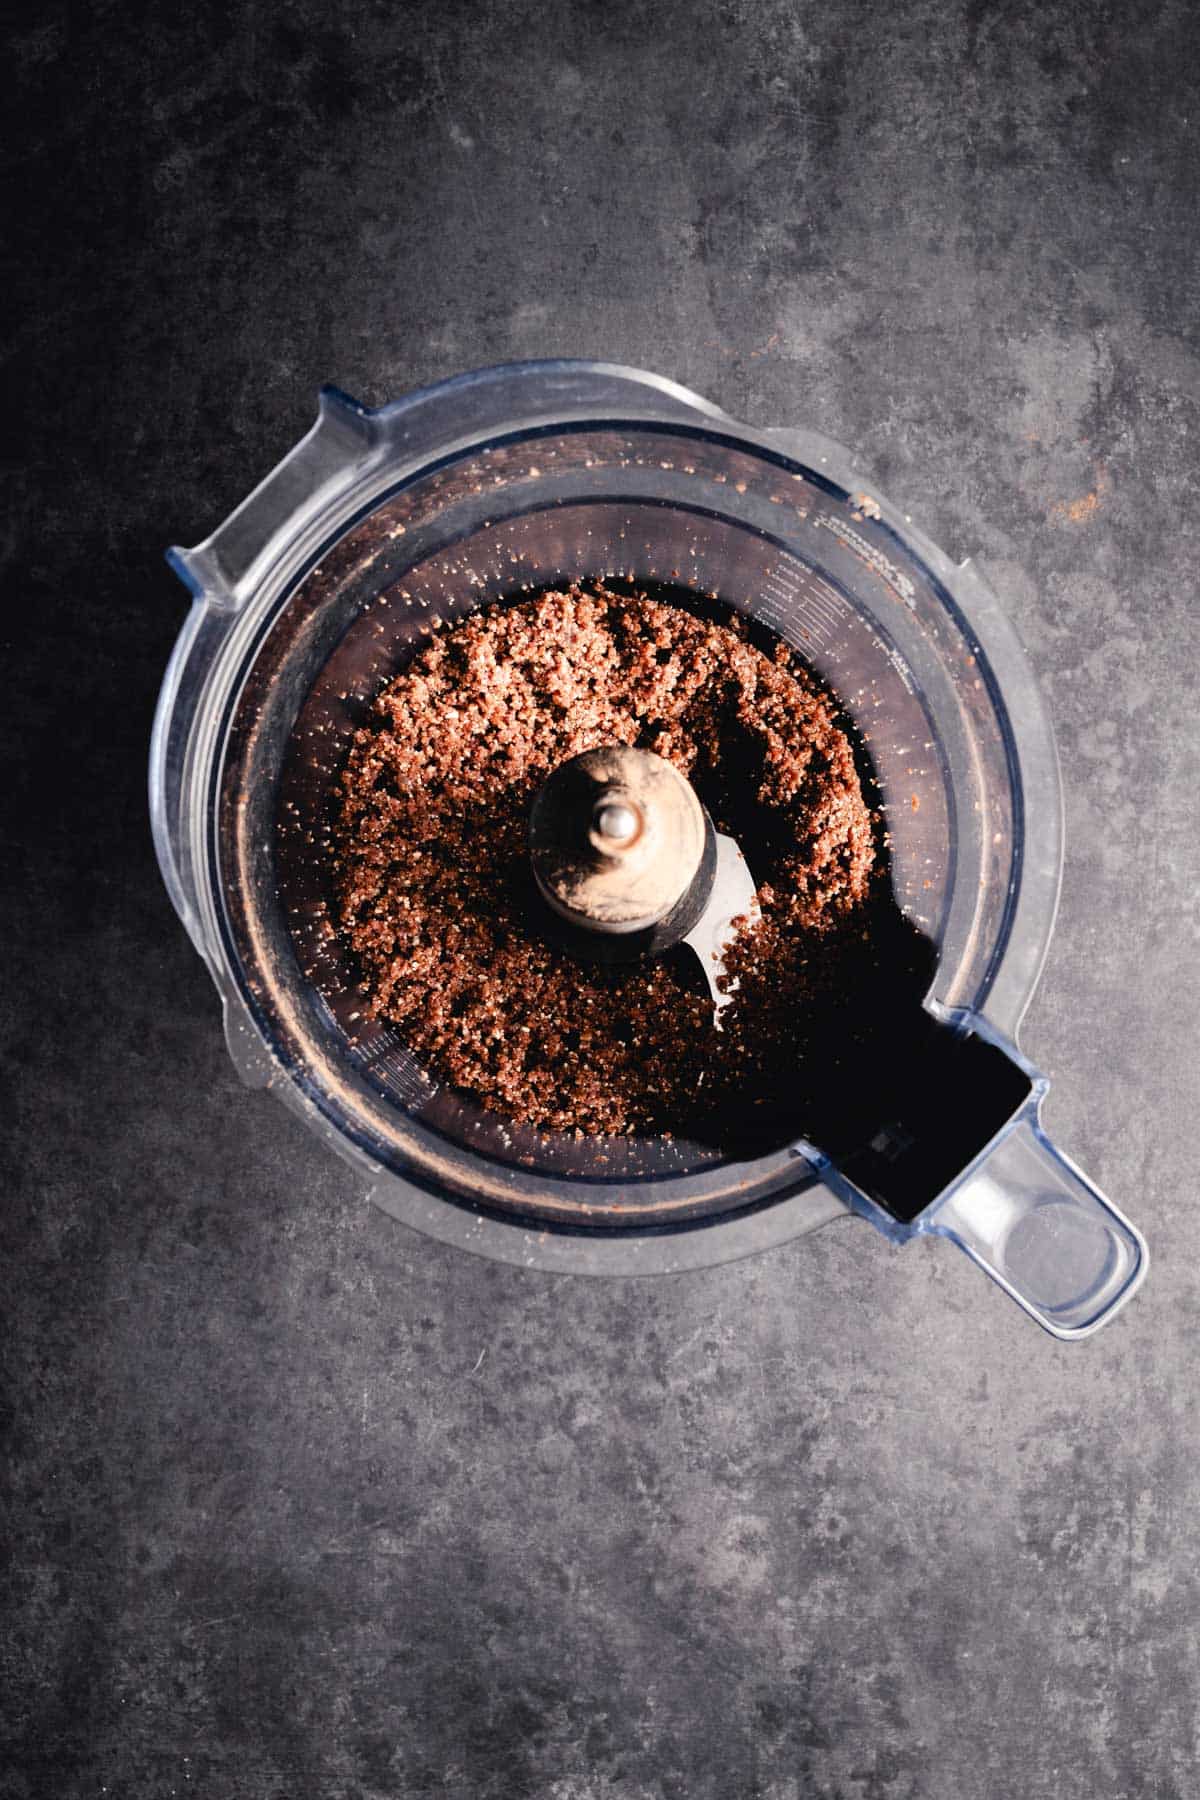
- Add pecans to your food processor and pulse until fully blended and crumbly (about 15 seconds). Add all remaining crust ingredients into the food processor and blend for 30-45+ seconds. The mixture should look pretty crumbly but stick together when squeezed together. This is crucial for achieving that perfect cheesecake crust texture.
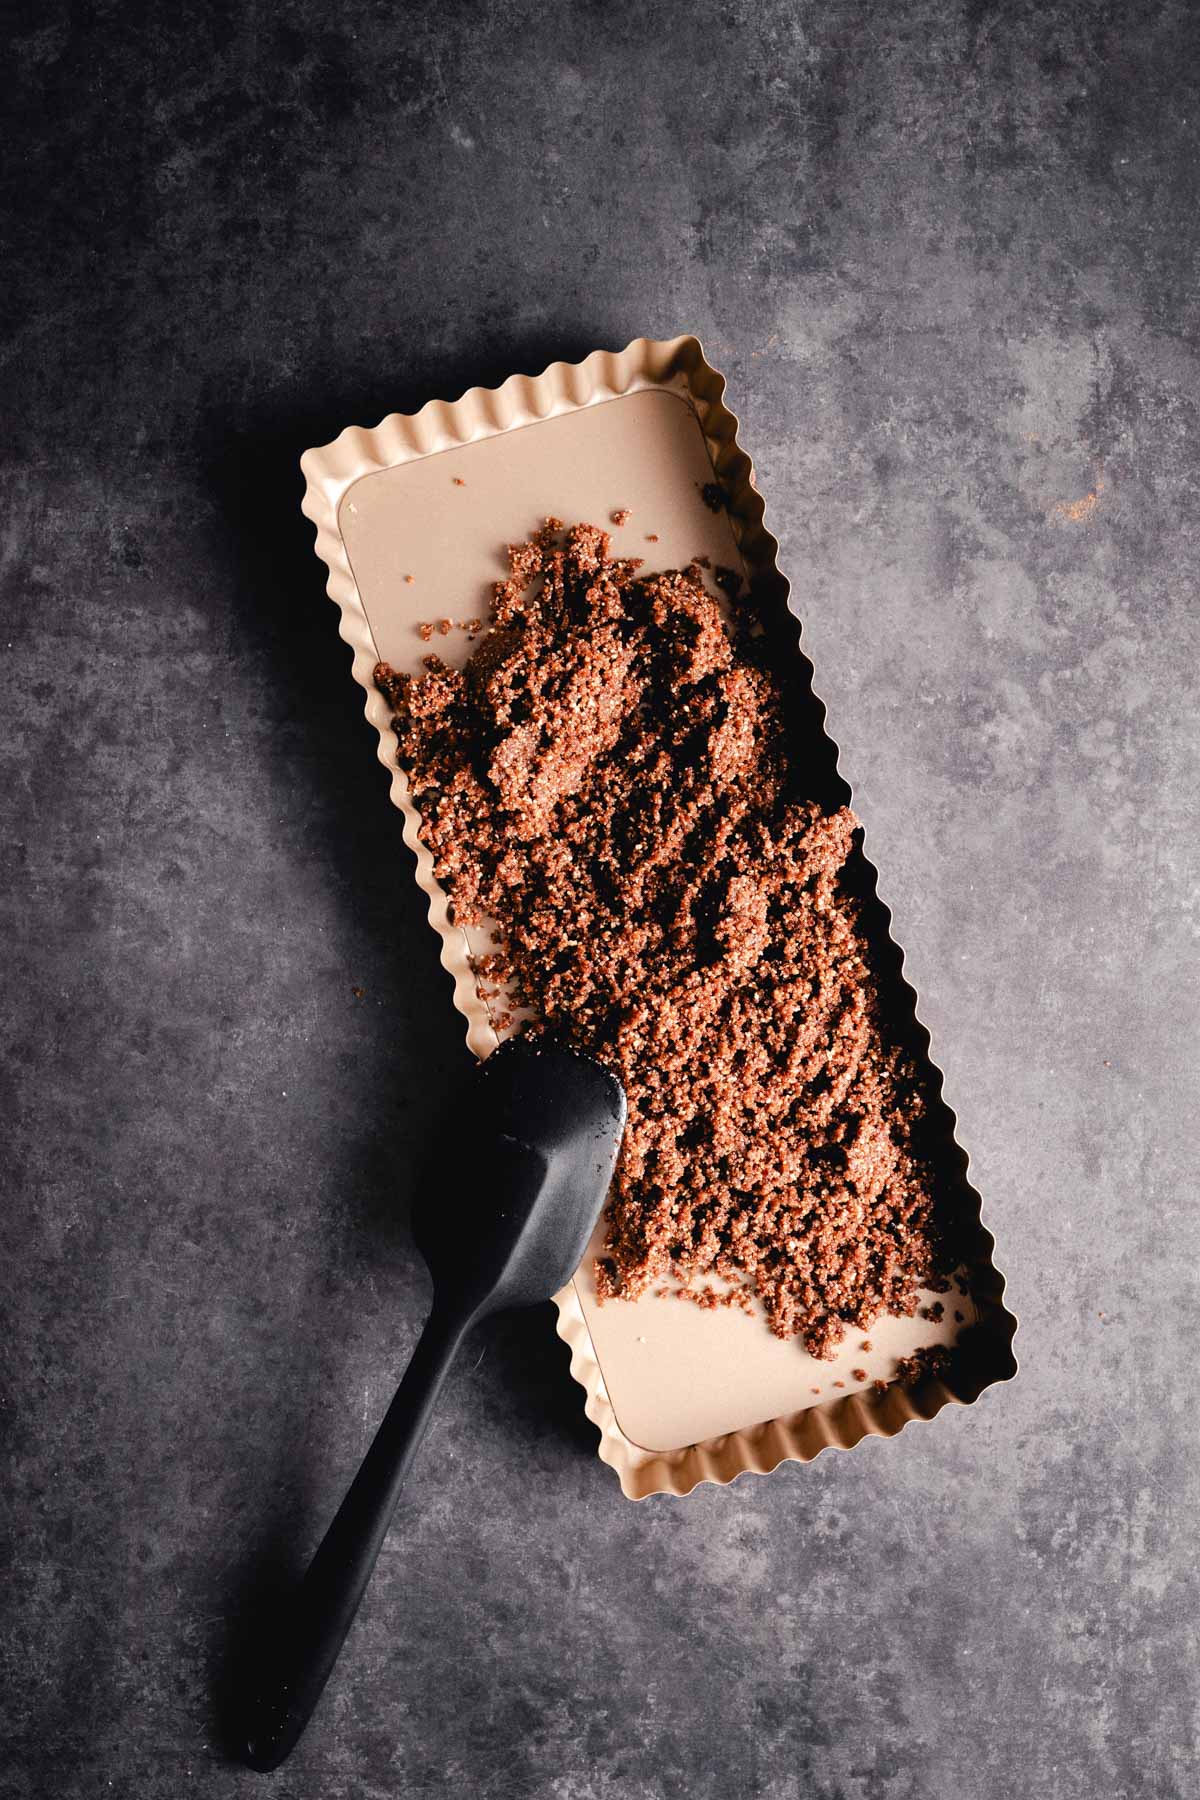
- Press the mixture firmly into the bottom of a lined springform pan, ensuring an even layer. Using parchment paper at the bottom of the pan makes removal easier and ensures best results.
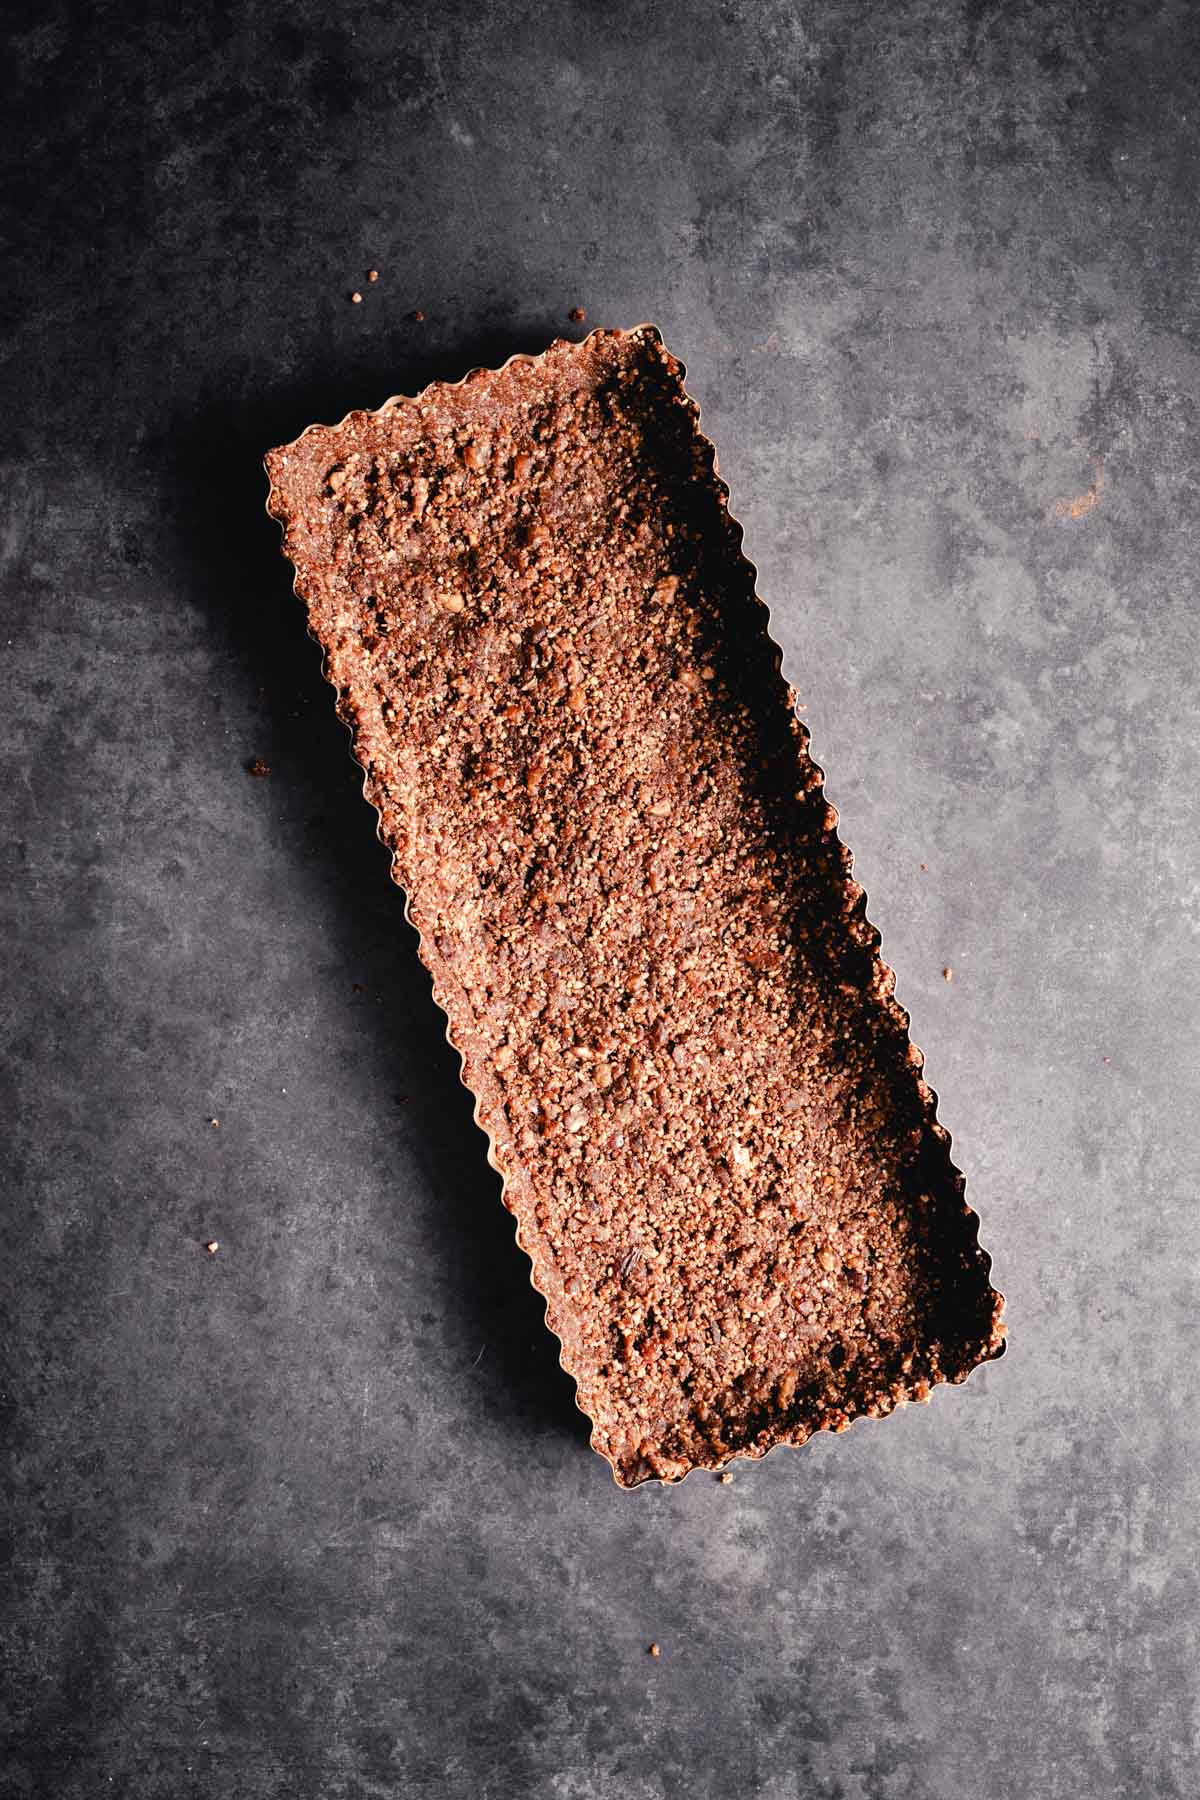
- Place the crust in the freezer while you prepare the filling. This step is vital for a firm and crunchy base, setting the stage for the rich chocolate flavor to come.
Would you like to save this?
For the Filling
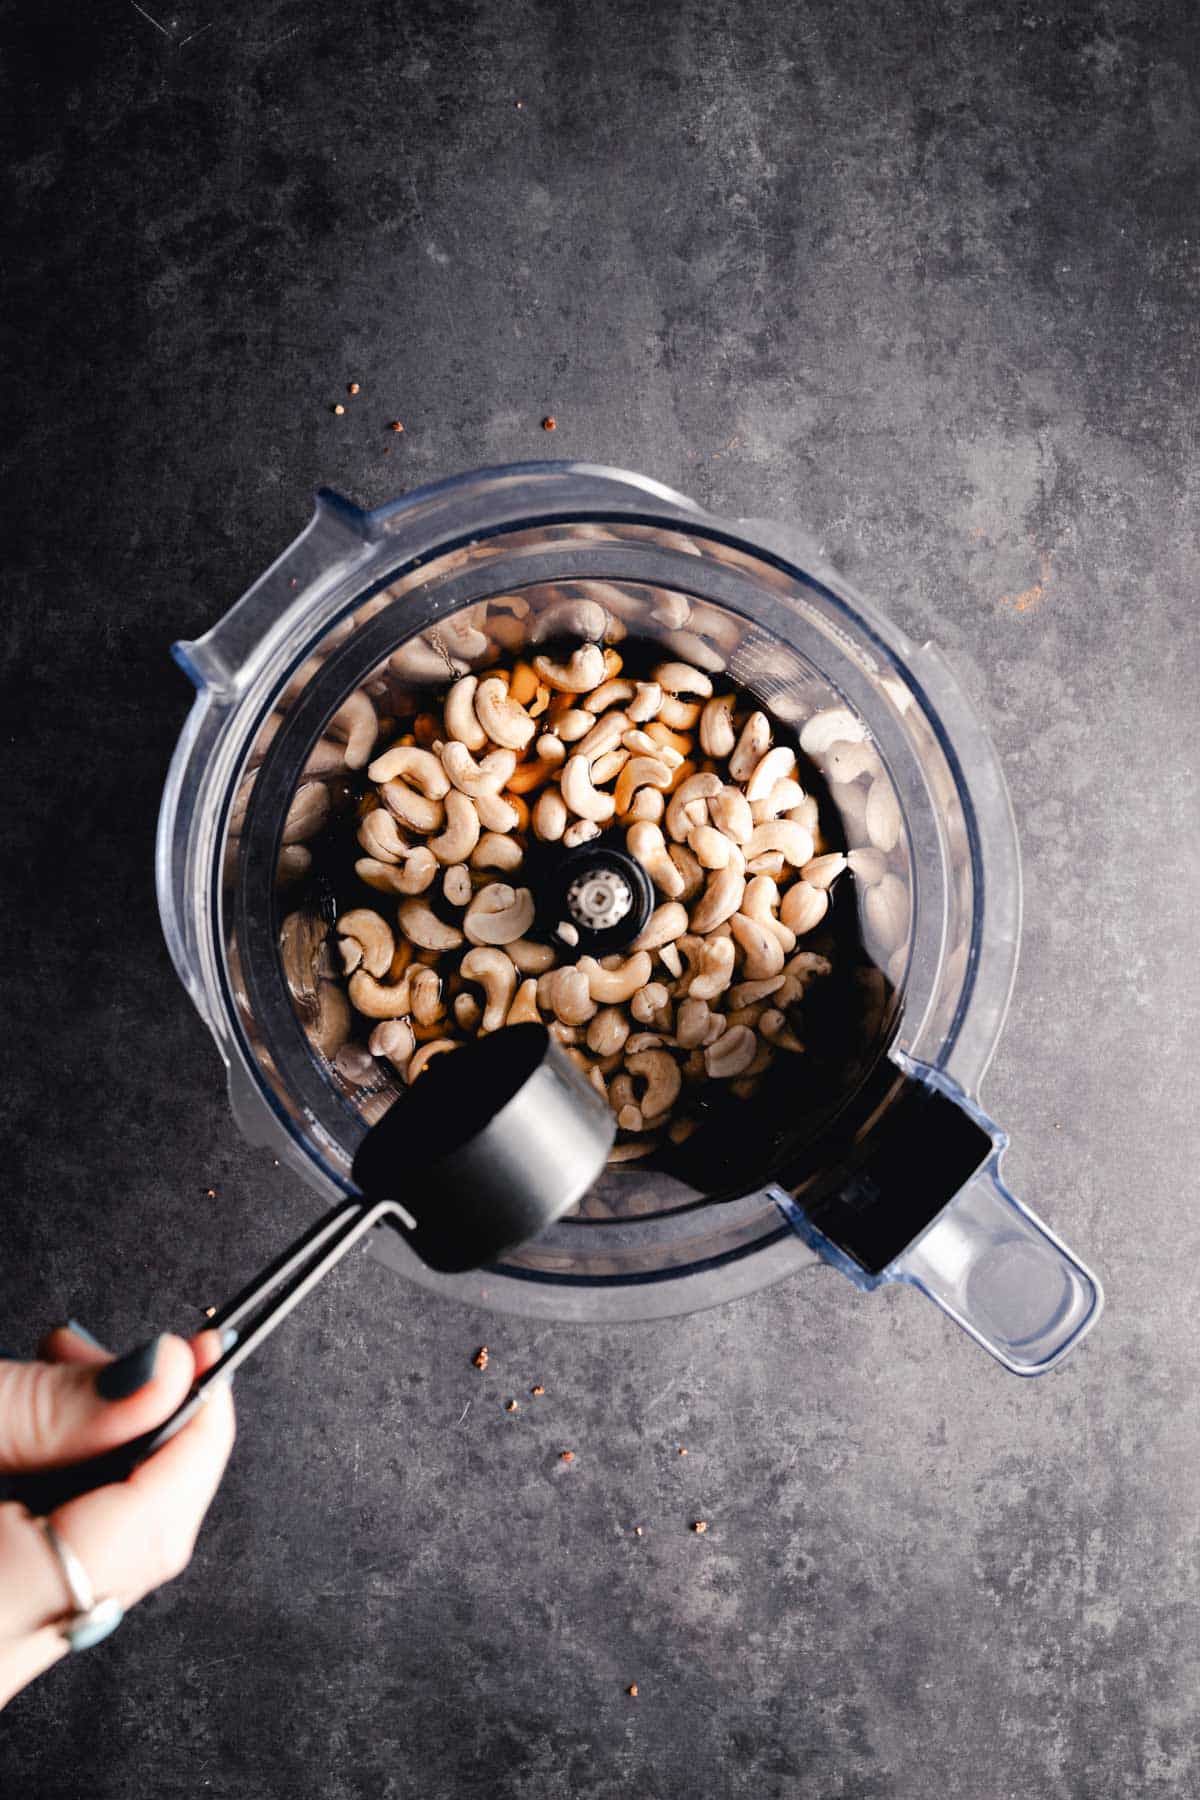
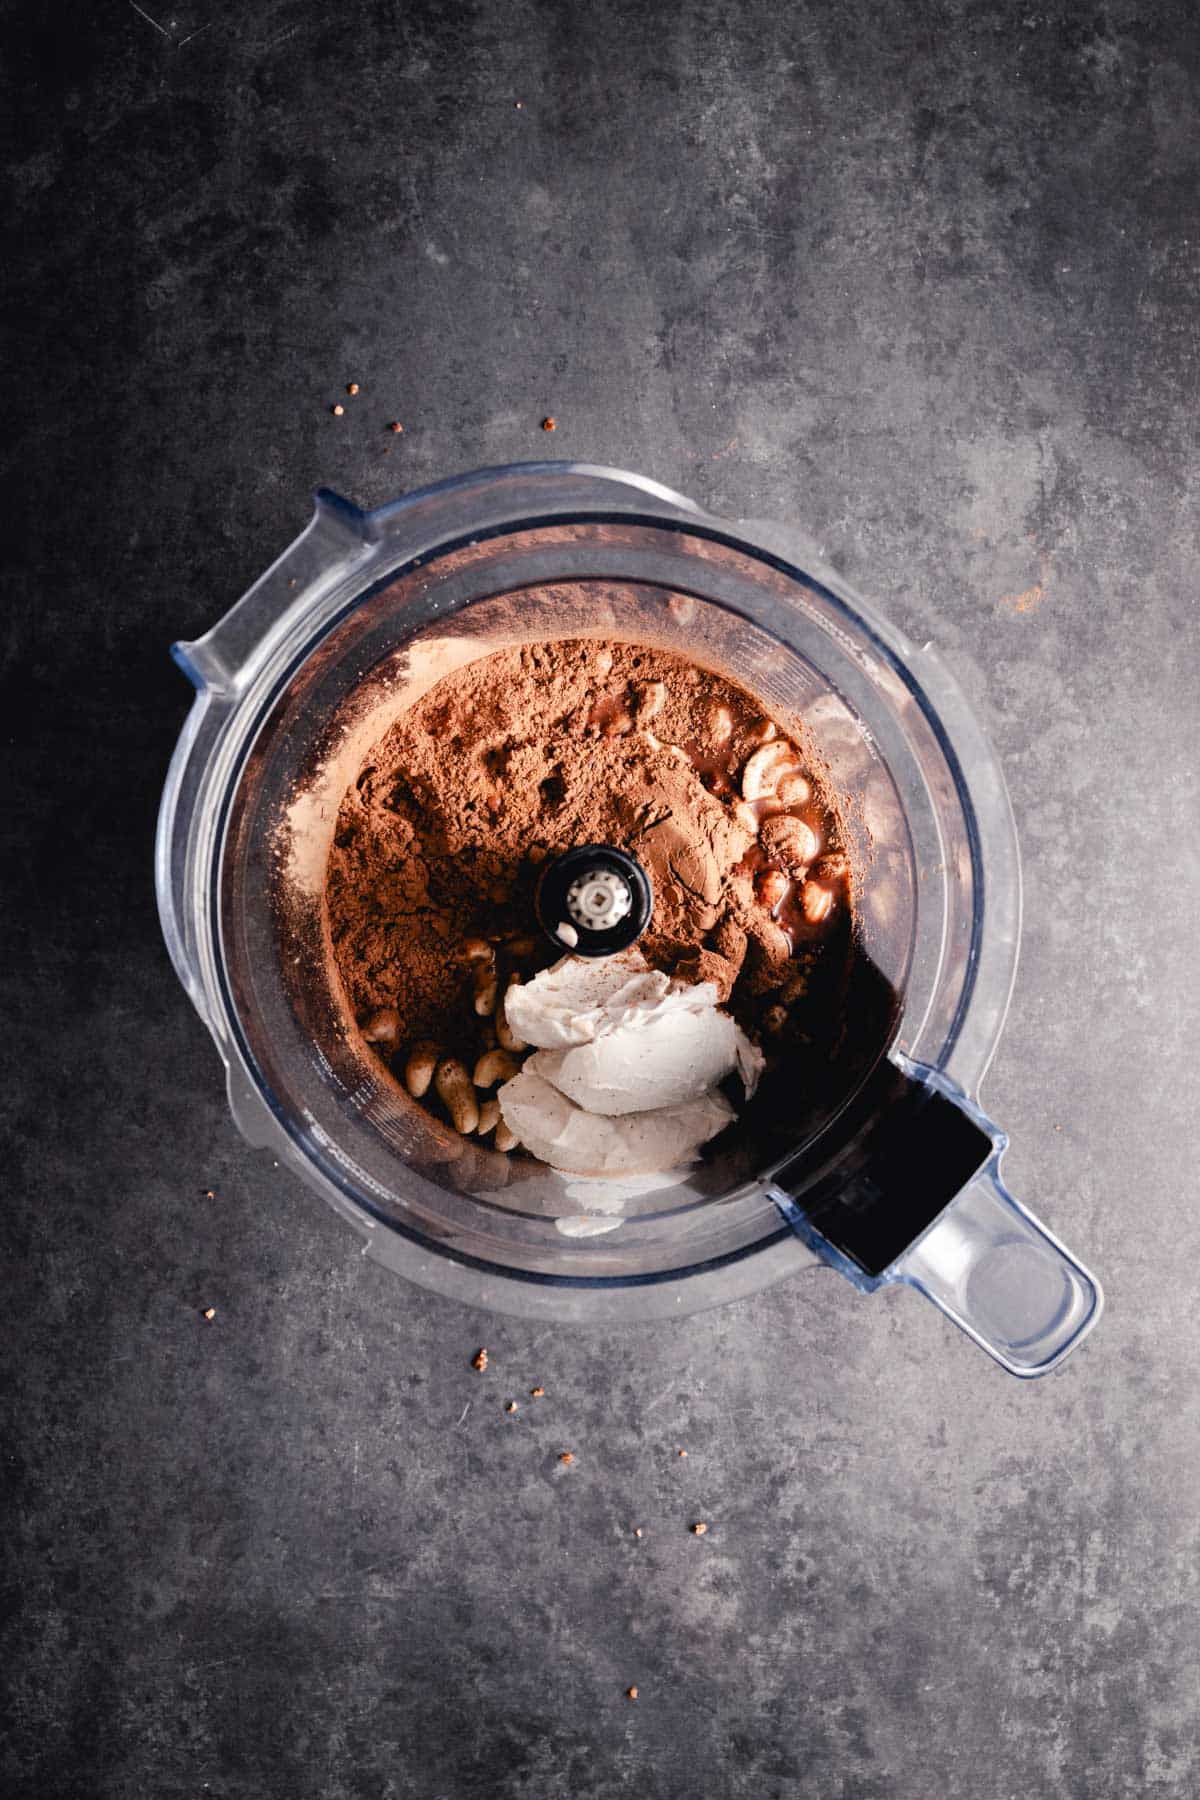
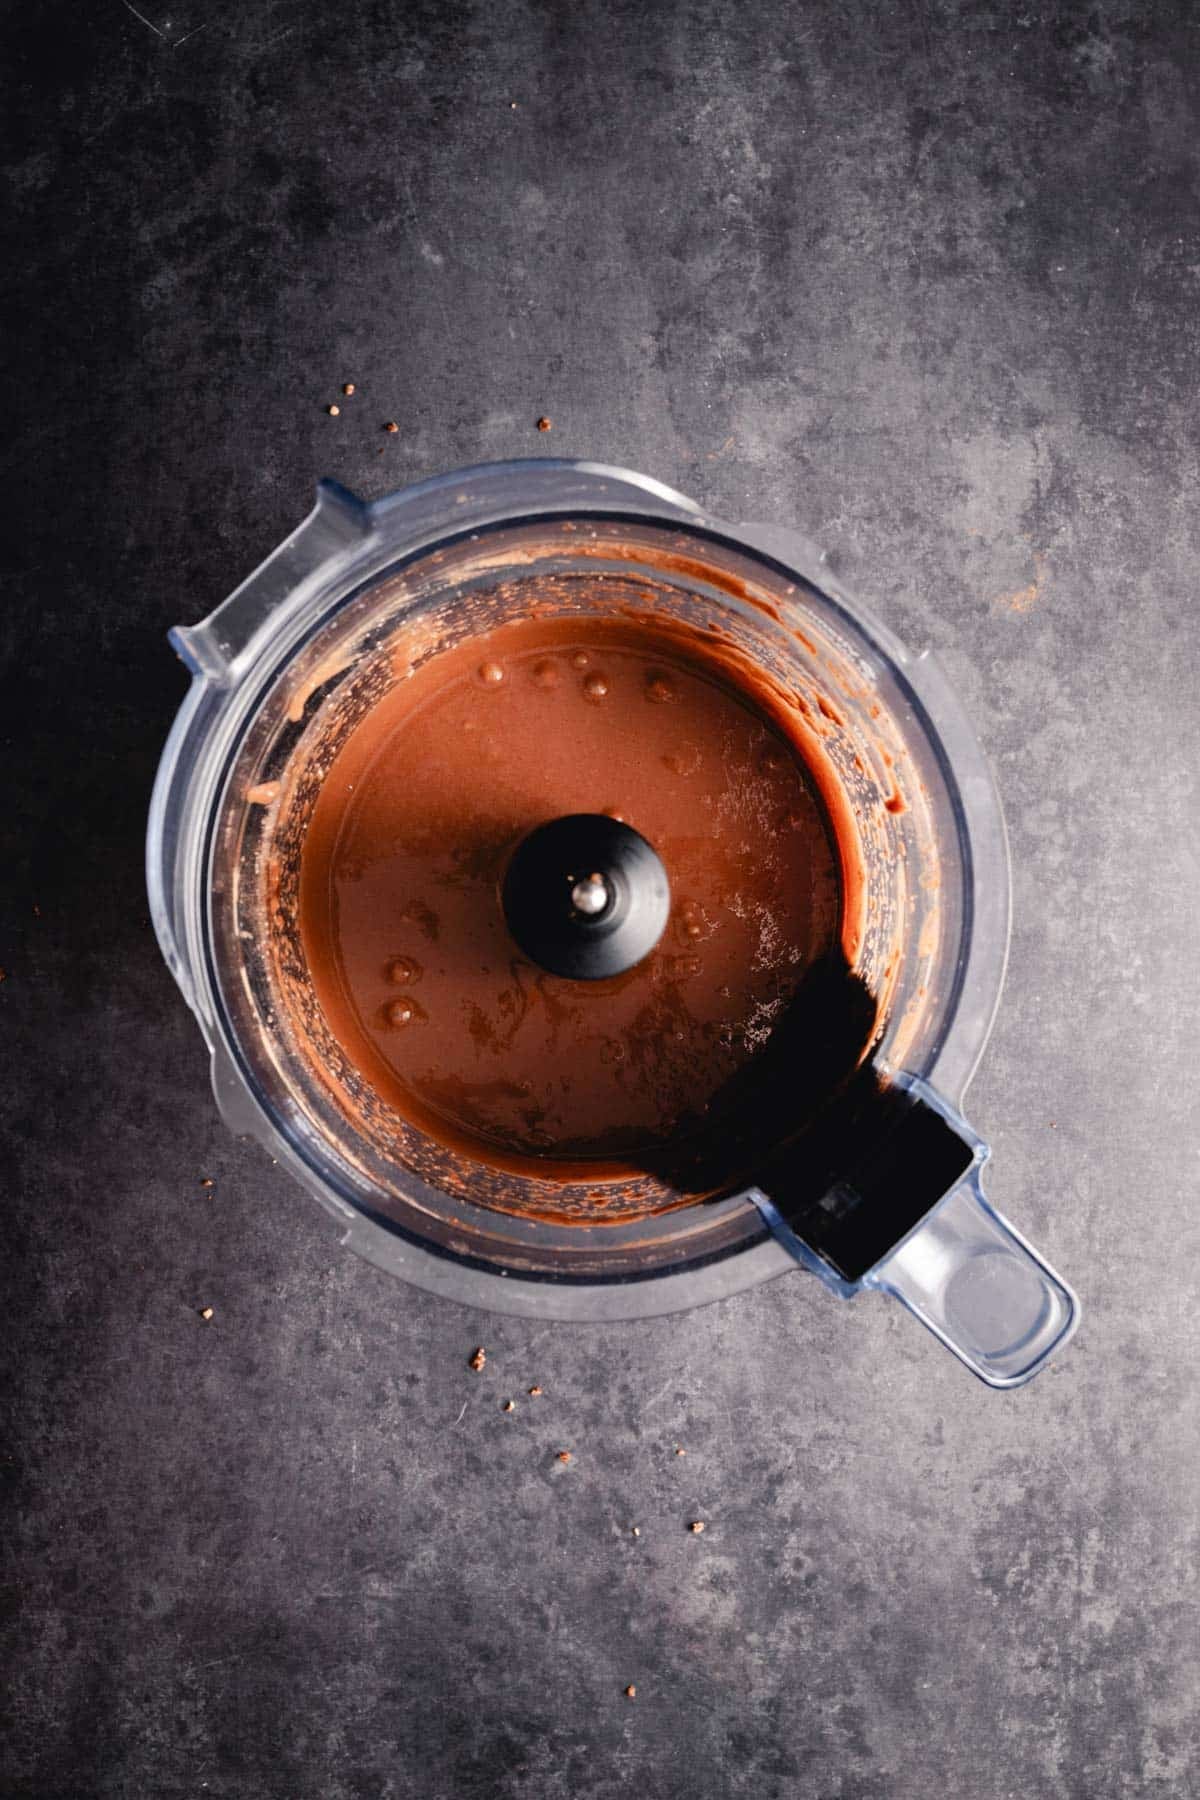
- In a food processor (or blender), add all of the filling ingredients. Blend on high for about 30-60+ seconds until the mixture reaches a smooth consistency, with no cashew bits remaining.
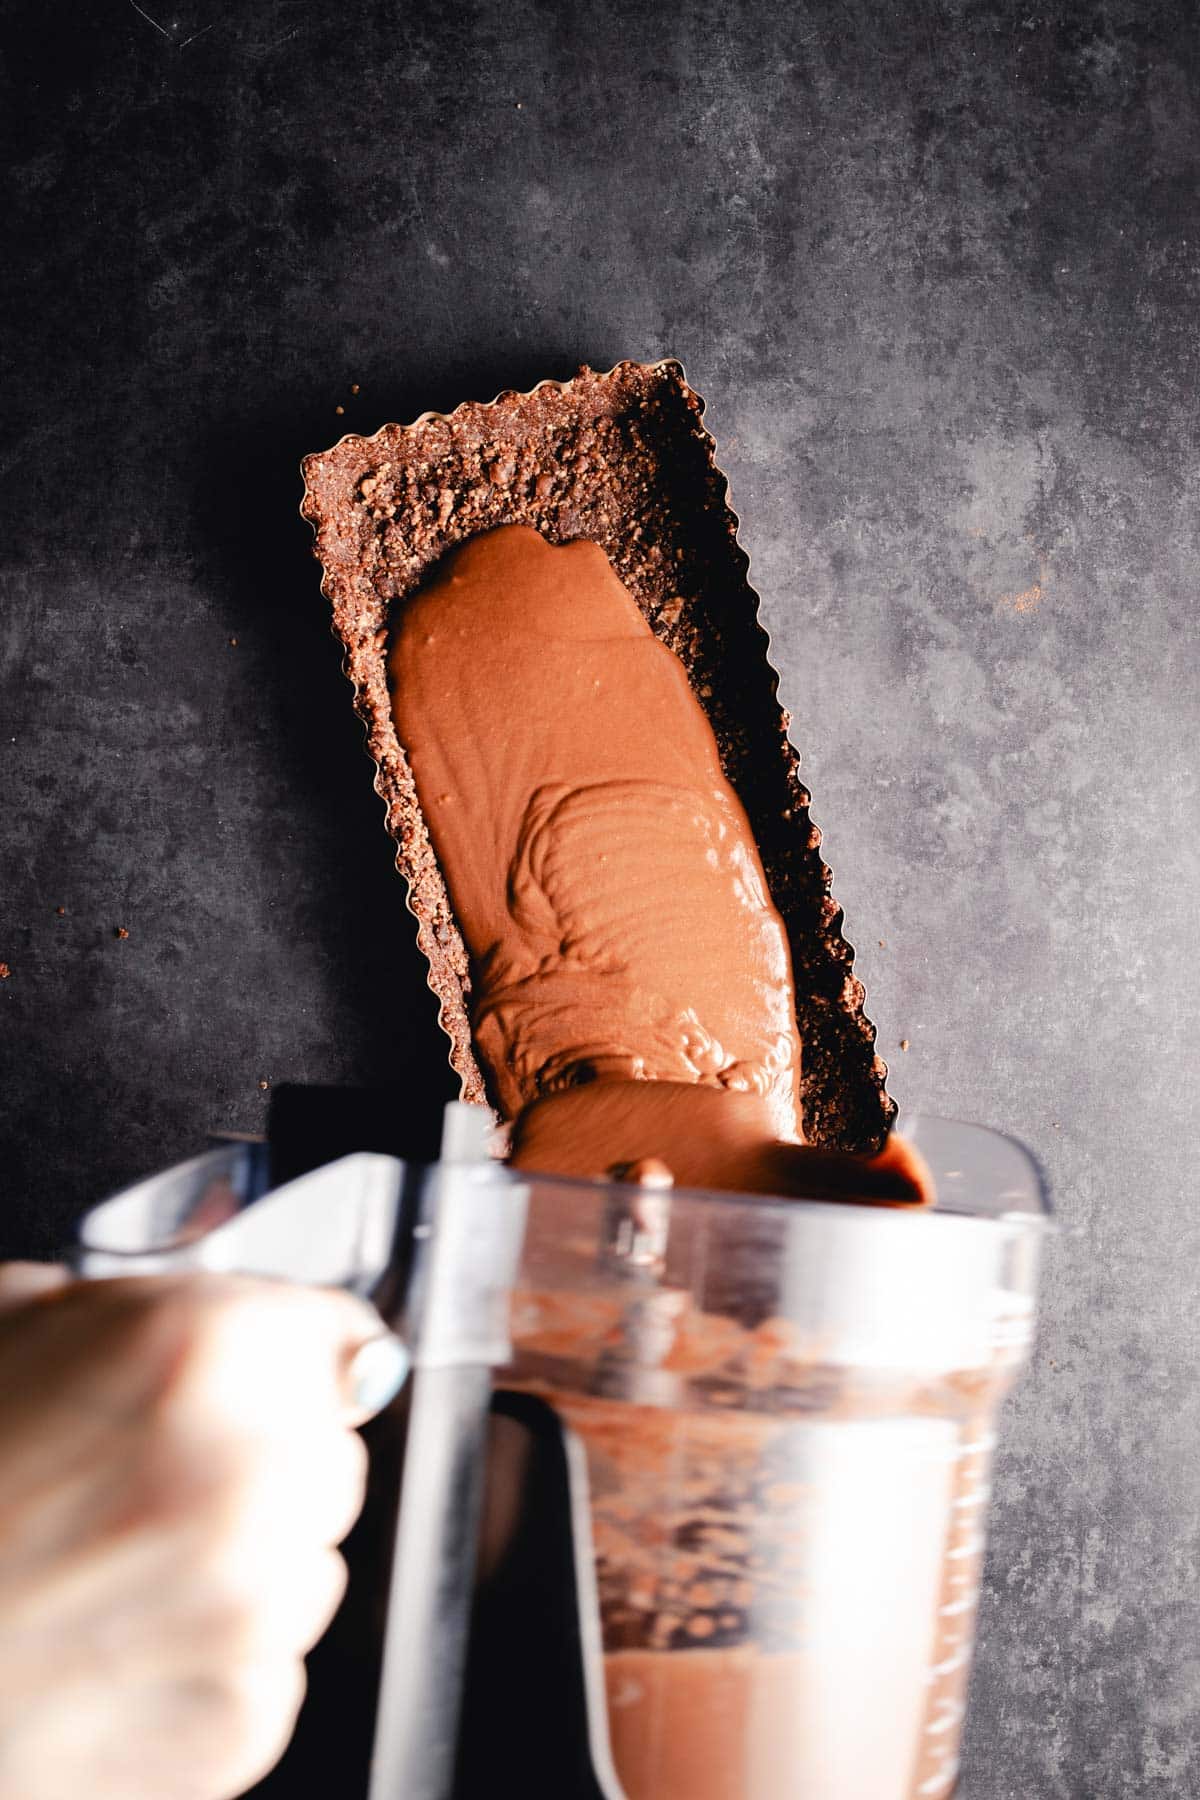
- Pour the filling into the crust, smoothing the top with a spatula. Tap the pan gently on the counter to remove any air bubbles.
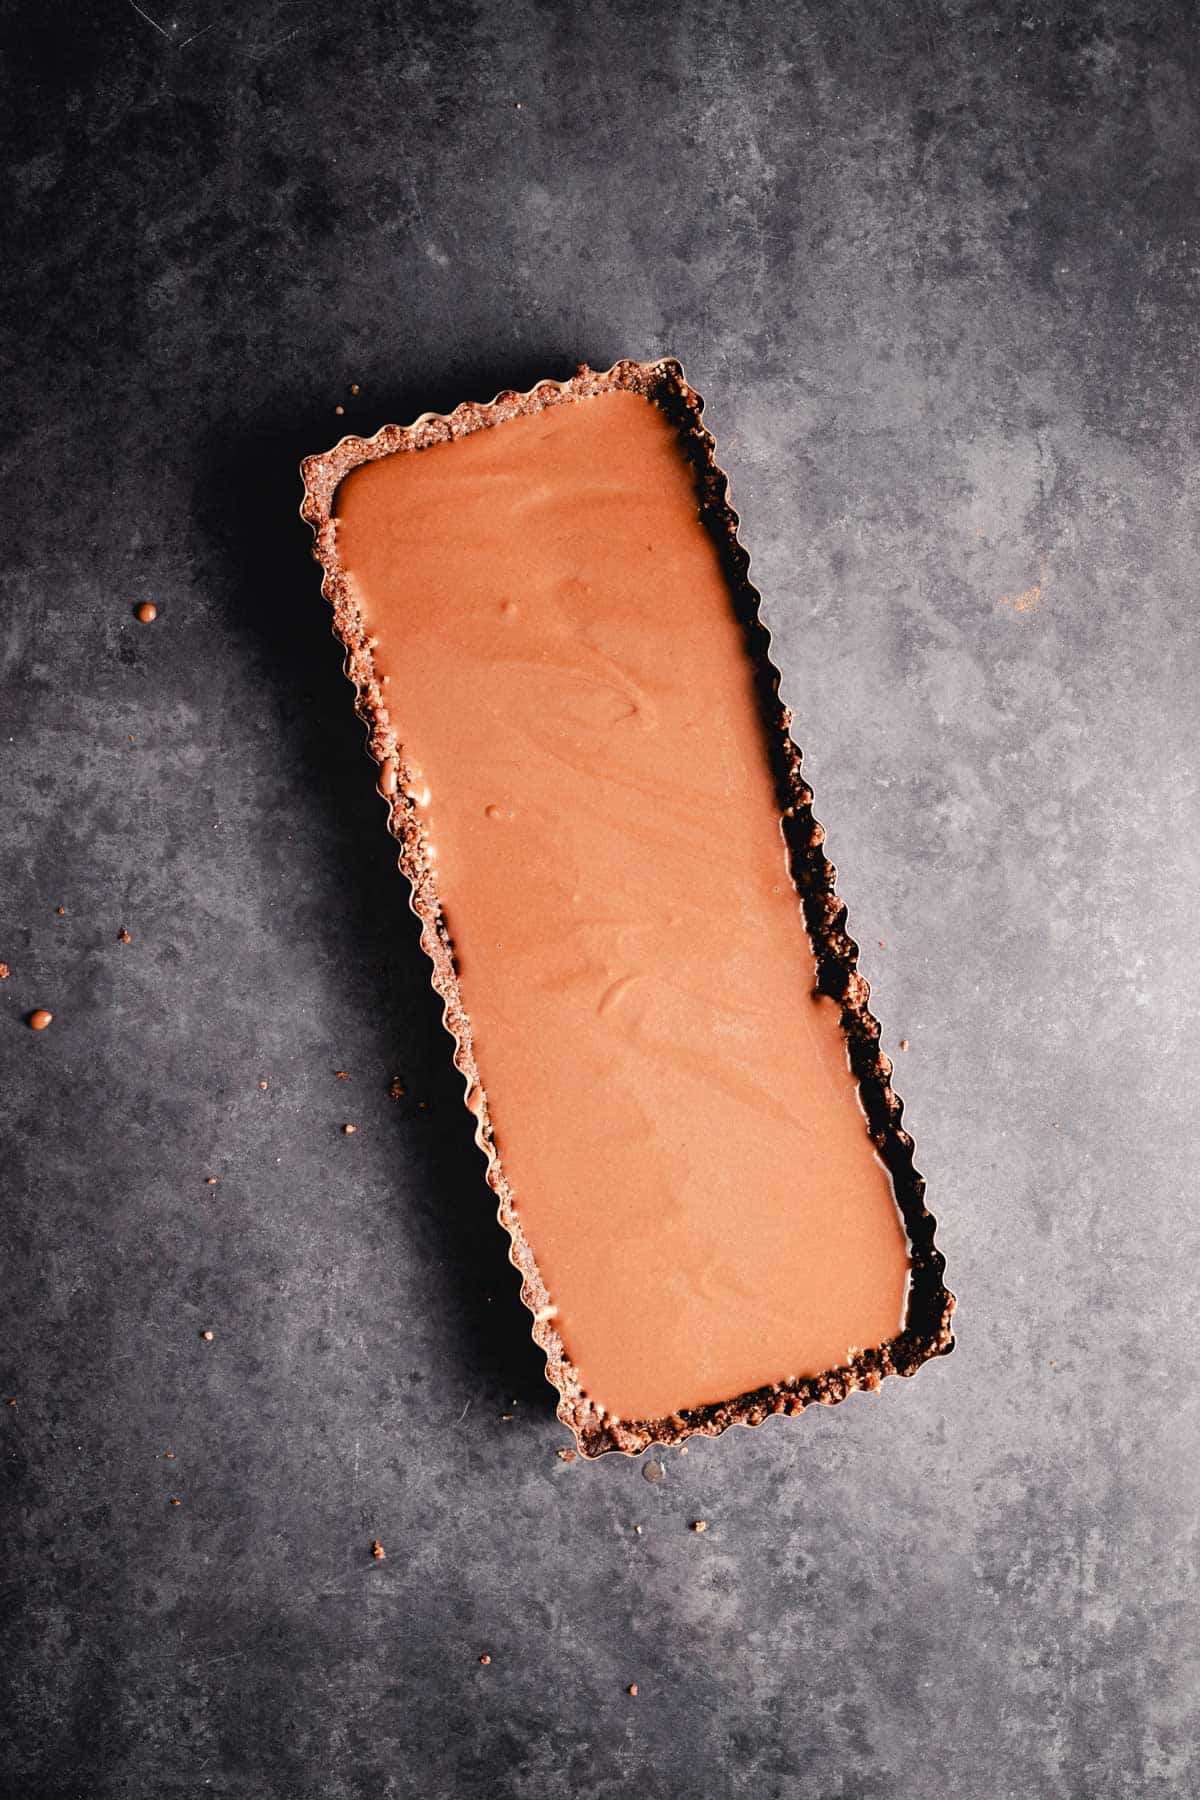
- Freeze for at least 3 hours or until the cheesecake is firm to the touch. This no-bake cheesecake is the perfect dessert for those special occasions when you want an easy recipe that is sure to impress.
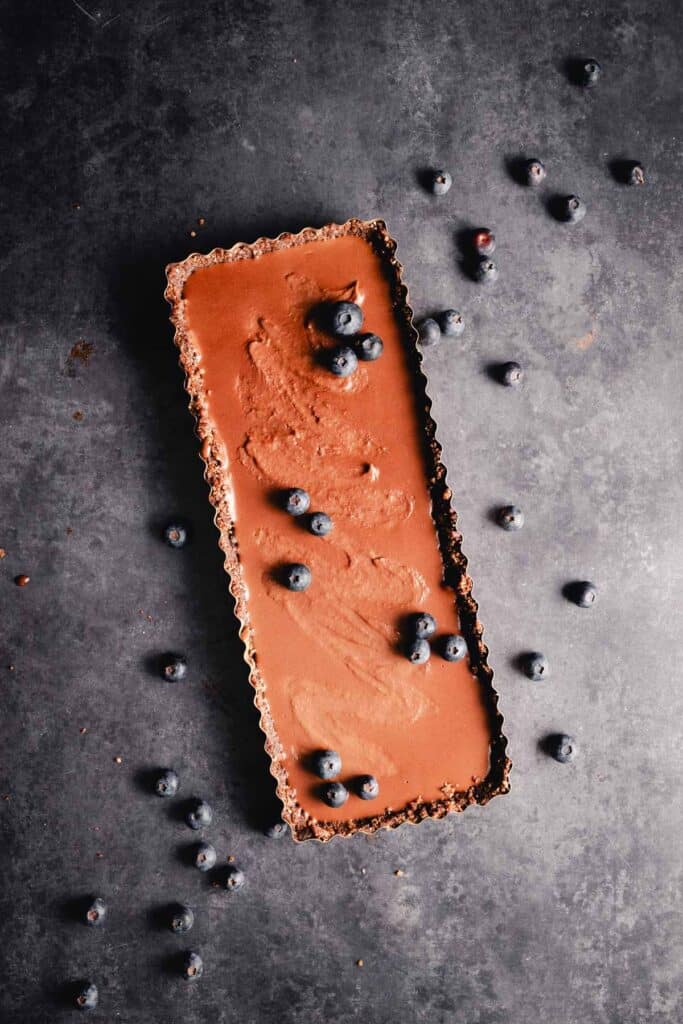
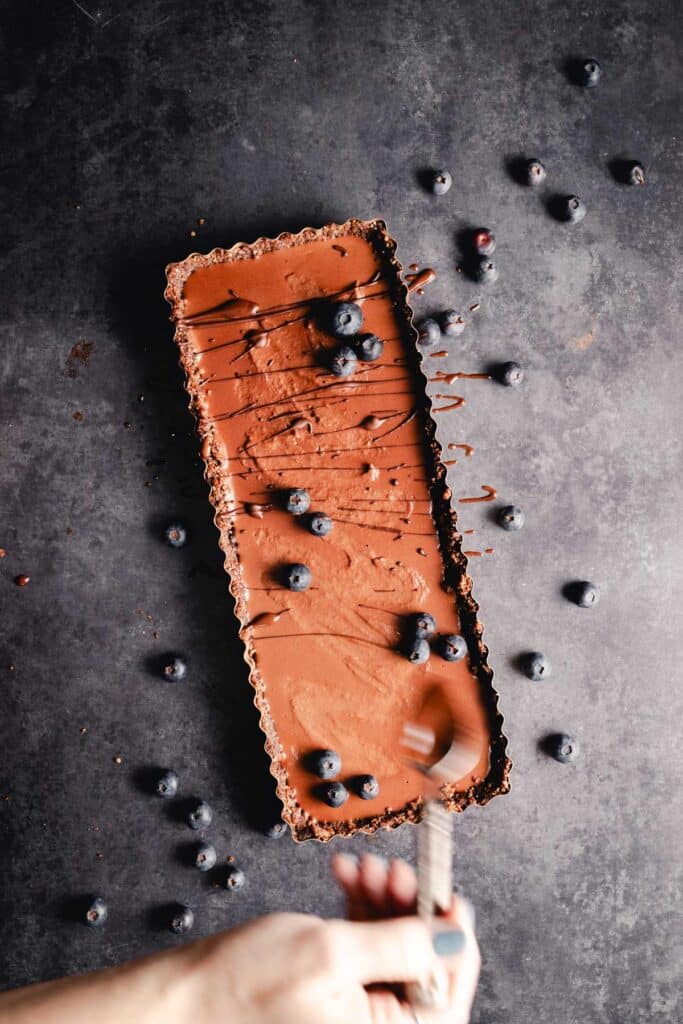
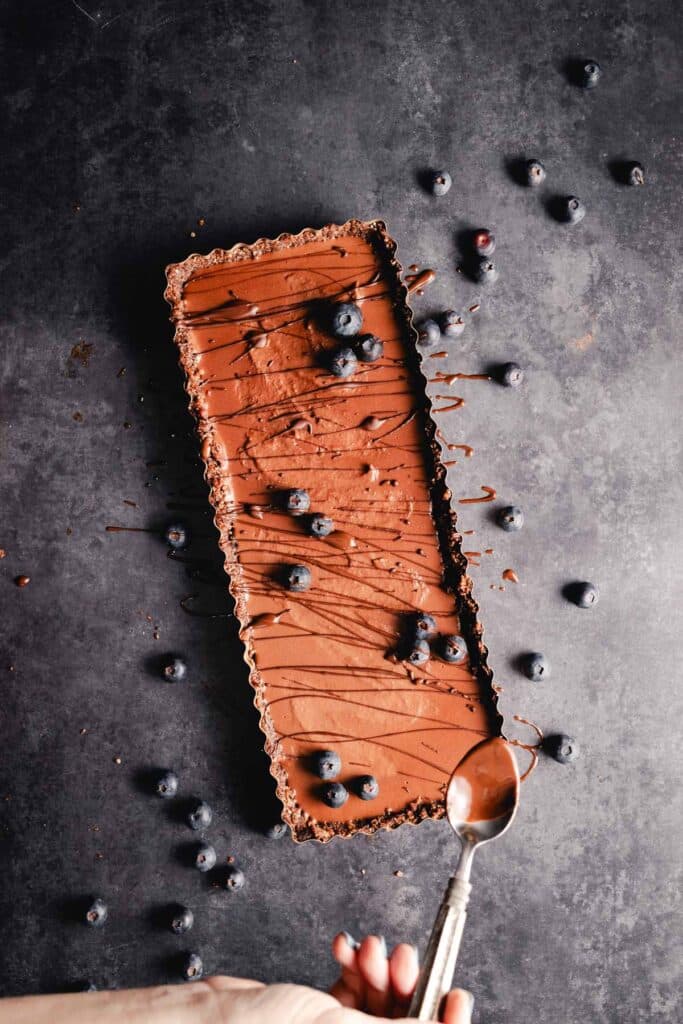
- Top with melted chocolate and fresh or frozen fruit if you like!

Serving Tips
Remove the cheesecake from the freezer about 15-20 minutes before serving. This step is crucial for achieving the perfect creamy texture.
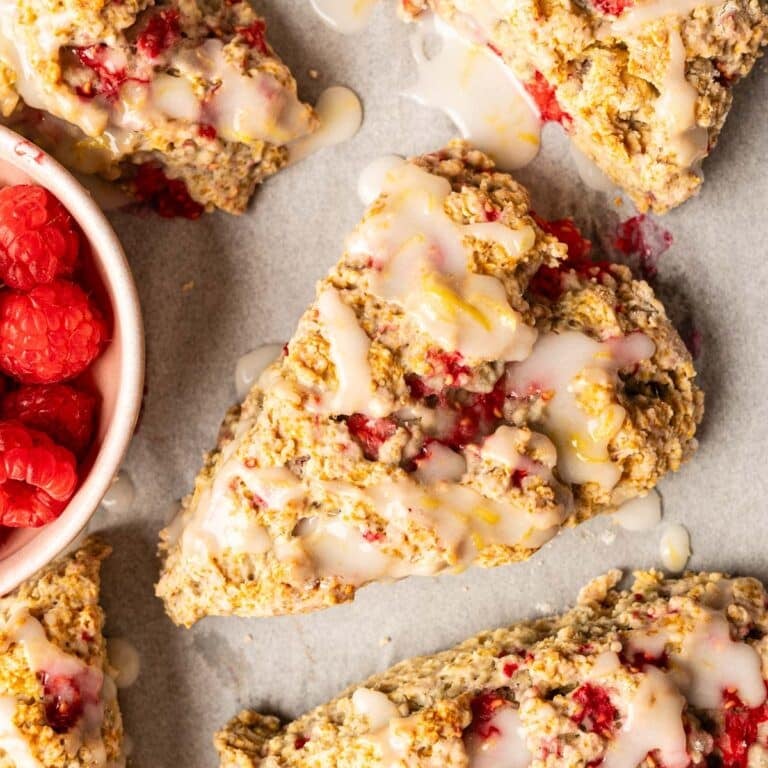
Garnish with fresh raspberries, chopped chocolate, or a sprinkle of sea salt for an extra flavor boost.
When planning the perfect menu for your dinner guests, don’t forget about serving the right beverages. Enjoy this vegan chocolate cheesecake with a cup of golden milk latte, vegan matcha latte, or infused pomegranate water.
Storage Tips
If anything is left of this no-bake chocolate cheesecake, you must keep it in the freezer. Having leftovers is the best, since you’ll have a tasty, chocolaty treat waiting for you any time the mood strikes. Just make sure you eat it within one month!
FAQ
Vegan cheesecakes can be made with all sorts of ingredients, from soaked raw cashews and coconut milk to vegan cream cheese. If you follow my recipe, you won’t be disappointed, especially if you have an array of guests with food allergies. No one will believe it’s vegan, dairy-free, and gluten-free, and you won’t have to make everyone a separate dessert.
Violife has a smooth and creamy texture with a neutral flavor, while Tofutti has a texture closer to cream cheese. Either option works great for making vegan cheesecakes.
A New York-style cheesecake has a dense yet creamy texture and a flavor that features a bit of tang. Regular cheesecake is often lighter and fluffier without that tanginess.

If you tried this Vegan Chocolate Cheesecake Recipe or any other recipe on my blog, please leave a 🌟 star rating and let me know how it went in the 📝 comments below. Thanks for visiting!
Recipe
Vegan Chocolate Cheesecake
Equipment
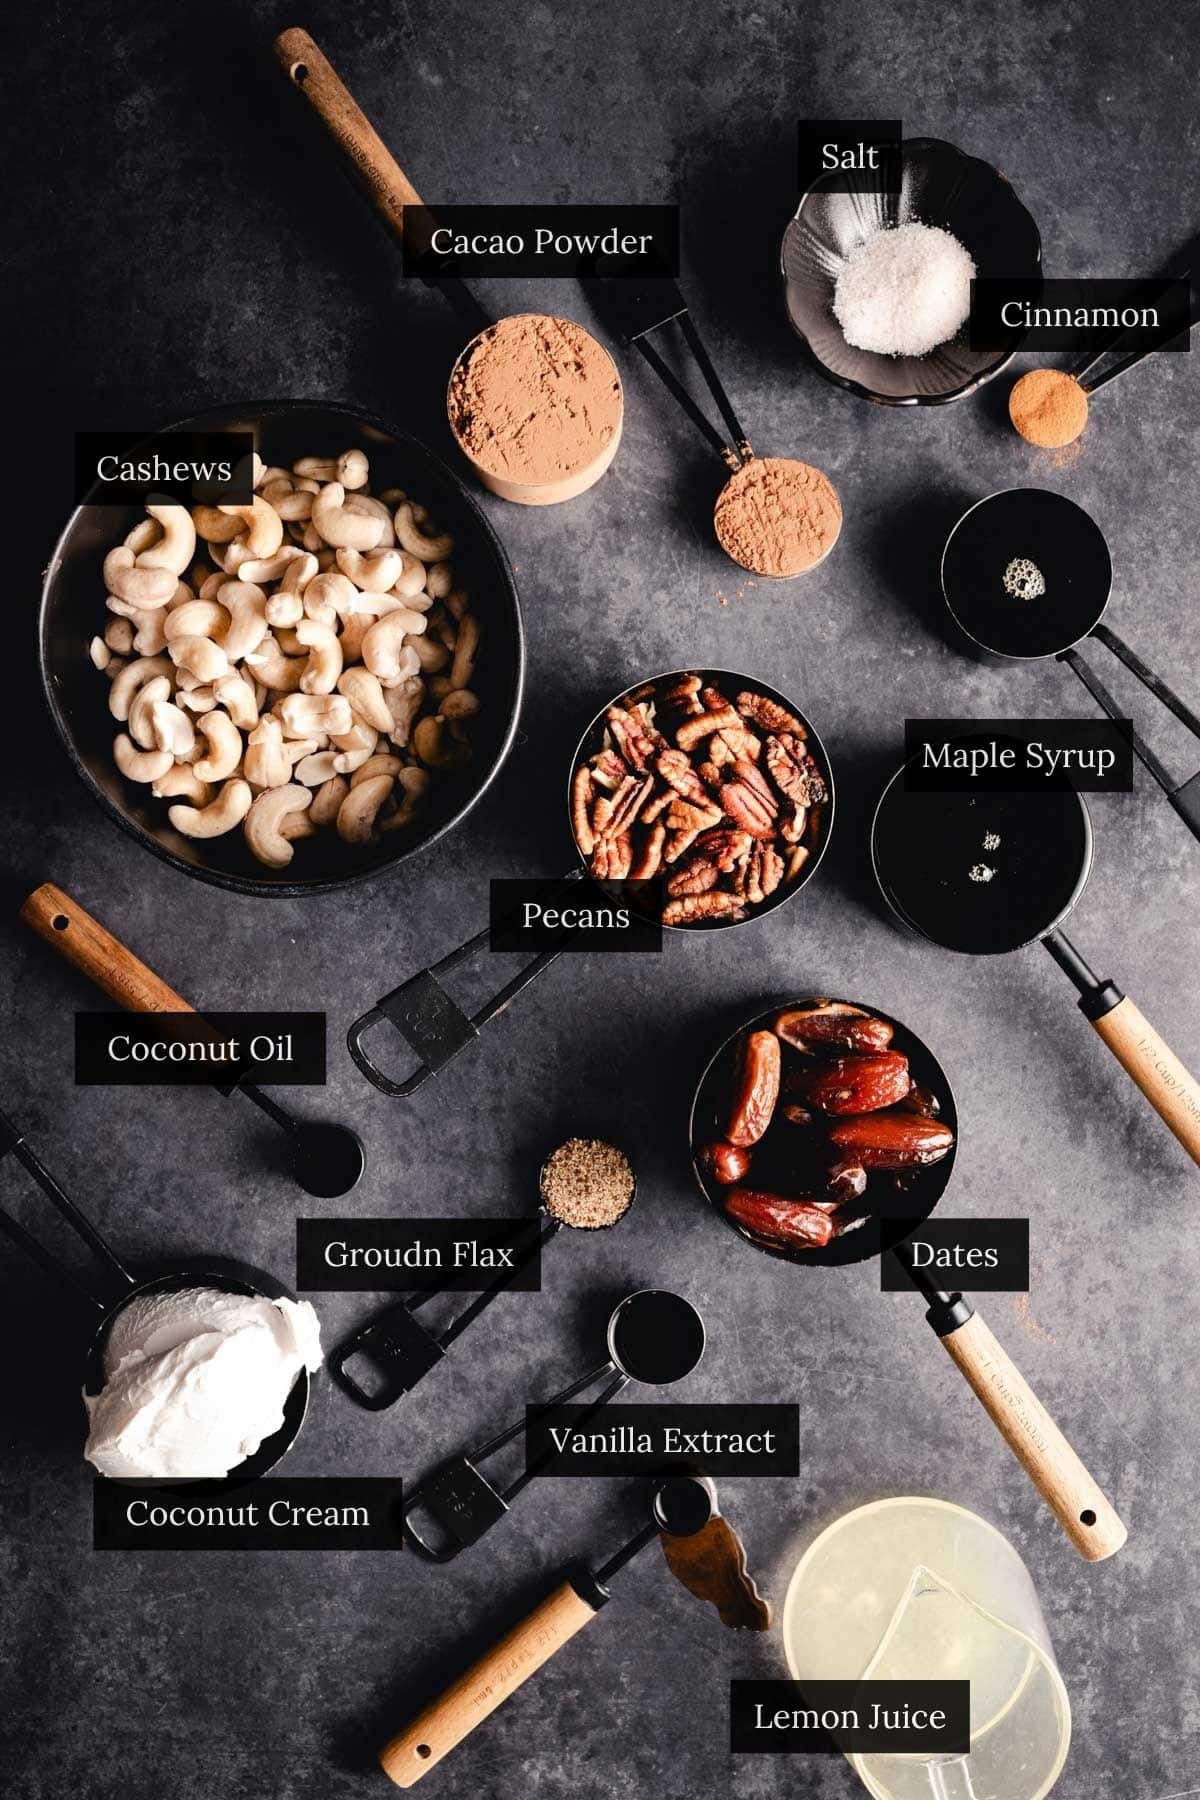
Ingredients
For the Crust
- 1 1/2 cup pitted Medjool dates, room temperature
- 1 1/2 cup pecans
- 1 1/2 teaspoon ground flax seed
- 1 1/2 teaspoon melted coconut oil
- 1/2 teaspoon salt
- 3/4 teaspoon pure vanilla extract
- 2 tablespoons cacao powder
For the Filling
- 1 1/2 cups raw cashews, (soaked overnight for 8+ hours)
- 3/4 cup maple syrup
- 1 13.5- ounce can of full-fat coconut milk, use only the cream portion
- 2 tablespoons lemon juice
- 1 teaspoon vanilla extract
- 1/2 teaspoon cinnamon
- 1/8 teaspoon salt
- 1/3 cup cacao powder
Instructions
For the Crust
- Add pecans to your food processor and pulse until fully blended and crumbly (about 15 seconds). Add all remaining crust ingredients into the food processor and blend for 30-45+ seconds. The mixture should look pretty crumbly but stick together when squeezed together. This is crucial for achieving that perfect cheesecake crust texture.
- Press the mixture firmly into the bottom of a lined springform pan, ensuring an even layer. Using parchment paper at the bottom of the pan makes removal easier and ensures best results.
- Place the crust in the freezer while you prepare the filling. This step is vital for a firm and crunchy base, setting the stage for the rich chocolate flavor to come.
For the Filling
- In a food processor (or blender), add all of the filling ingredients. Blend on high for about 30-60+ seconds until the mixture reaches a smooth consistency, with no cashew bits remaining.
- Pour the filling into the crust, smoothing the top with a spatula. Tap the pan gently on the counter to remove any air bubbles.
- Freeze for at least 3 hours or until the cheesecake is firm to the touch.
- Top with melted chocolate and fresh or frozen fruit if you like!
Notes
Remove the cheesecake from the freezer about 15-20 minutes before serving. This step is crucial for achieving the perfect creamy texture. Garnish with fresh raspberries, chopped chocolate, or a sprinkle of sea salt for an extra flavor boost. Storage Tips
If anything is left of this no-bake chocolate cheesecake, you must keep it in the freezer. Having leftovers is the best, since you’ll have a tasty chocolaty treat waiting for you any time the mood strikes. Just make sure you eat it within one month!
Nutrition
Did you make this recipe?
We’d love to see! Tag @raepublic on Instagram!
Reference
Fusar-Poli, L., Gabbiadini, A., Ciancio, A., Vozza, L., Signorelli, M. S., & Aguglia, E. (2022). The effect of cocoa-rich products on depression, anxiety, and mood: A systematic review and meta-analysis. Critical reviews in food science and nutrition, 62(28), 7905–7916. https://doi.org/10.1080/10408398.2021.1920570


This was sooooo good!
I’m so glad you like it!
Hands down the best cheesecake I’ve ever had.
Yay! So glad you enjoyed it!